Yolov8 – Object Detection Model
-
-
InfoDetail_Editor: Tony
-
3584
- Wx Share
-
-
YOLO (You Only Look Once) is a popular object detection model. Its high performance and accuracy have led to its rapid rise in popularity. This article will introduce how to use YOLOv8 for object detection.
-

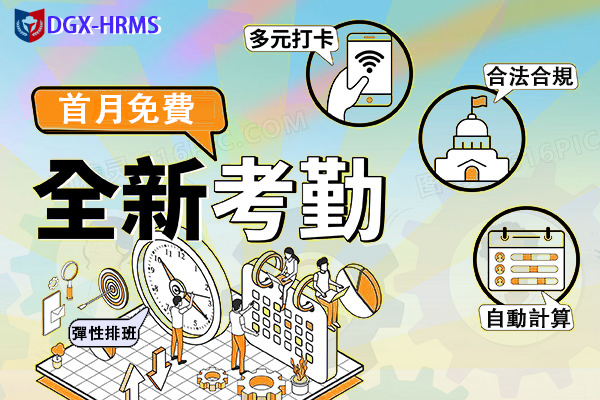
Time & Payroll Suite
Attendance, Payroll and Access Control Solution for Cost Reduction and Productivity Gains Details
All‑in‑one automated timekeeping and payroll system with robust, secure processes to guarantee payroll integrity. Includes leave management, shift rostering, multi‑site and chain support, multi‑ledger accounting, and comprehensive modules.
Yolov8 – Object Detection Model
Model Introduction
GitHub Location: https://github.com/ultralytics/ultralytics
Official Website: https://ultralytics.com/
Installing Ultralytics
pip install ultralytics
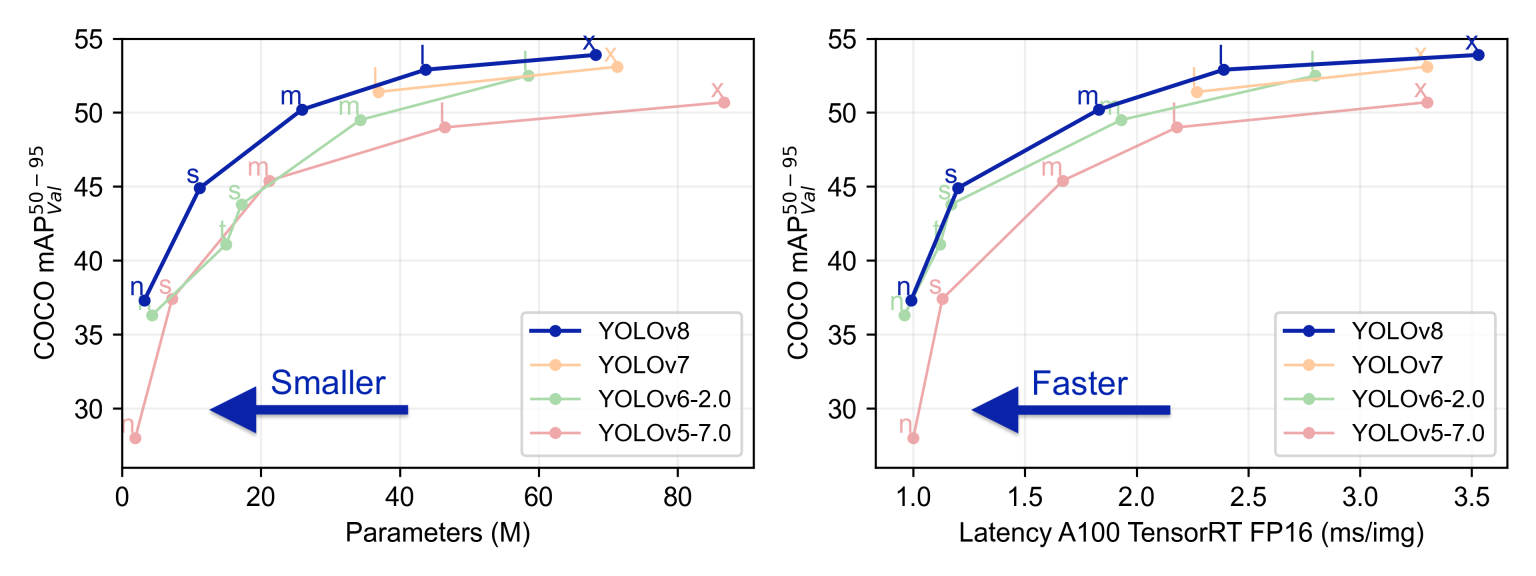
YOLOv8 was originally developed and released by the developers at Ultralytics, aiming to provide a high-performance and efficient solution for object detection tasks. Built on cutting-edge advancements in deep learning and computer vision, it delivers unparalleled performance in both speed and accuracy. Its streamlined design makes it suitable for a wide range of applications and easily adaptable to different hardware platforms, from edge devices to cloud APIs.
Compared to previous versions of YOLO, YOLOv8 introduces several new design ideas and technologies to improve the model's accuracy and speed. It optimizes model structure, data augmentation, and network design, resulting in excellent results in object detection tasks. YOLOv8 not only performs well in general object detection tasks but can also be applied to various application areas such as autonomous driving, industrial inspection, and object recognition.
Model Installation
The official tutorial provides very clear guidance: https://docs.ultralytics.com/quickstart/
Here, I chose to install using pip. You only need to type this line:
pip install ultralytics
Execution using the command line:
yolo predict model=yolov8n.pt source='https://ultralytics.com/images/bus.jpg'
Execution using Python:
from ultralytics import YOLO
Load a model
model = YOLO("yolov8n.yaml") # build a new model from scratch
model = YOLO("yolov8n.pt") # load a pretrained model (recommended for training)
Use the model
model.train(data="coco128.yaml", epochs=3) # train the model
metrics = model.val() # evaluate model performance on the validation set
results = model("https://ultralytics.com/images/bus.jpg") # predict on an image
path = model.export(format="onnx") # export the model to ONNX format
# Load a model
model = YOLO("yolov8n.yaml") # build a new model from scratch
model = YOLO("yolov8n.pt") # load a pretrained model (recommended for training)
# Use the model
model.train(data="coco128.yaml", epochs=3) # train the model
metrics = model.val() # evaluate model performance on the validation set
results = model("https://ultralytics.com/images/bus.jpg") # predict on an image
path = model.export(format="onnx") # export the model to ONNX format
Related tools recommended by the official documentation
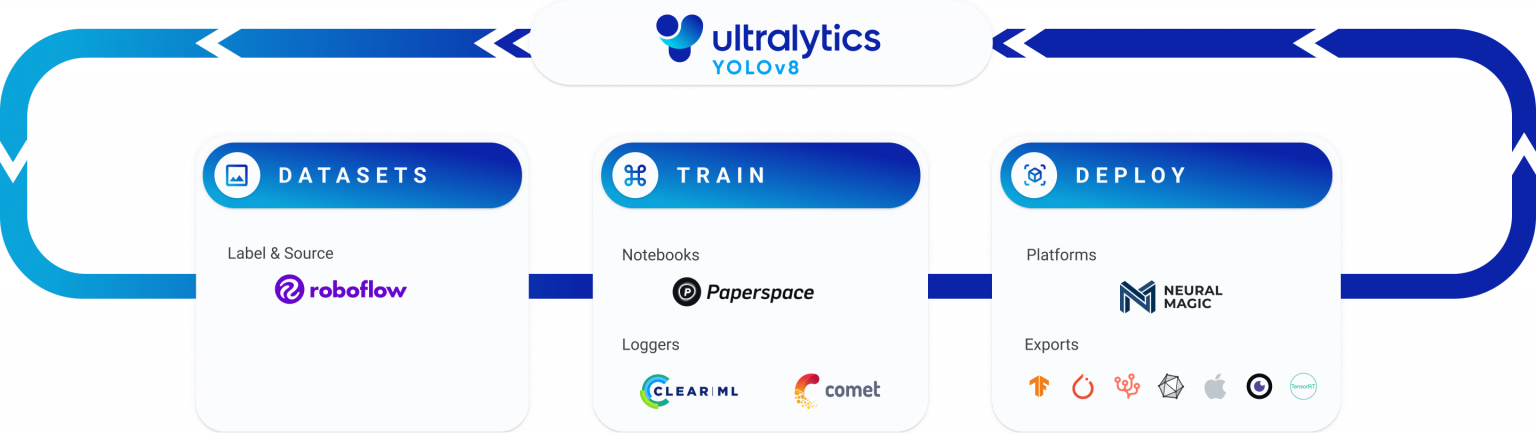
Building an object detection model requires annotation, image enhancement, modification, training, deployment, and the integration of the model into the user's program. For these processes, YOLO provides a complete ecosystem to implement these steps.
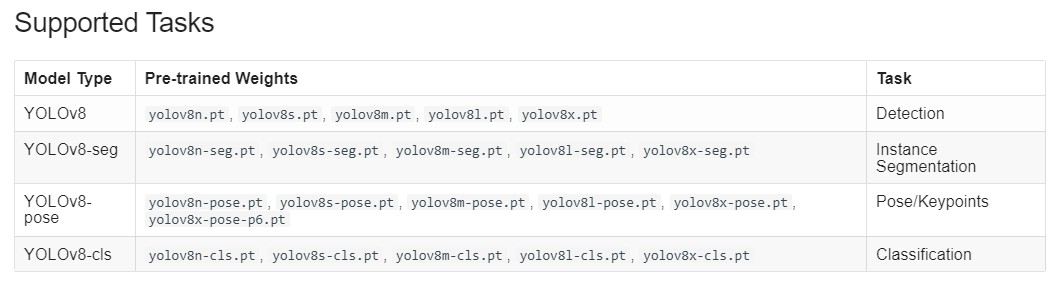
Supported Tasks
Building Your Own Model
Below is a code example from the official website that includes modeling, prediction, and outputting the model:
from ultralytics import YOLO
Create a new YOLO model from scratch
model = YOLO('yolov8n.yaml')
Load a pretrained YOLO model (recommended for training)
model = YOLO('yolov8n.pt')
Train the model using the 'coco128.yaml' dataset for 3 epochs
results = model.train(data='coco128.yaml', epochs=3)
Evaluate the model's performance on the validation set
results = model.val()
Perform object detection on an image using the model
results = model('https://ultralytics.com/images/bus.jpg')
Export the model to ONNX format
success = model.export(format='onnx')
I tried training the existing model on new data. During training, the following model message appeared:
Explanation of the above values:
Epoch (Iteration Rounds): This is the number of iterations in the training process. Each iteration processes a batch of samples in the dataset.
GPU_mem (Memory Usage): Memory refers to the memory on the graphics processing unit (GPU). This number shows how much memory the GPU used in the current iteration.
box_loss (Box Regression Loss): This is a loss term in the training of the object detection model, used to optimize the location of detection boxes.
cls_loss (Classification Loss): One of the loss terms in object detection model training, used to optimize object classification prediction.
dfl_loss (Transformation Loss): This may be a loss term for changes in the bounding box position during object detection.
Instances (Number of Instances): The number of object instances processed in each iteration of the training process.
Size (Dimensions): Possibly the size of the input image.
Class (Category): Refers to the different object categories.
Images (Number of Images): The number of images used to evaluate model performance.
Box (Bounding Box), P (Precision), R (Recall): These are metrics used to evaluate the performance of object detection models. Precision measures how many positive class predictions the model correctly makes, while recall measures how many positive class samples the model correctly detects.
mAP50, mAP50-95 (Mean Precision): These are the average precision calculated at different thresholds. mAP50 represents the average precision at a 50% IoU threshold, while mAP50-95 represents the average precision within the 50% to 95% IoU threshold range.
In the above figure, after 23 training epochs, its precision was 48.4%, and its F1 recall was 59%.
Handling Inconsistent Image Sizes
YOLO originally used the COCO dataset for modeling. In this dataset, images are 640px wide and long. However, the images used in actual applications are likely not 640x640 pixels. Therefore, image processing is necessary.
If only prediction is needed, resize_with_pad can be used to scale the image. This function maintains the same aspect ratio without distortion, adjusting the image size to the target width and height. If the target size does not match the image size, the image size will be adjusted and zero-padding will be used to match the requested size.

However, for training, you also need to adjust the size and padding of the bounding boxes accordingly, which is not an easy task.
Here's an example of how to do this: https://nbviewer.jupyter.org/github/aleju/imgaug-doc/blob/master/notebooks/B02%20-%20Augment%20Bounding%20Boxes.ipynb
Here are a few key techniques:
Adjusting Input Size: You can adjust the camera image to match the square size used when training the YOLO model. This may result in some white space in the image's width or height, but it will be compatible with the model.
Image Cropping: Crop the camera image to fit the square size required by the YOLO model. You can crop from the center of the image or other regions of interest to ensure that important target information is included.
Padding: If the image's aspect ratio doesn't match the required square size of the model, you can add padding to the shorter or longer side of the image to achieve a square size. Padding can use background color or content to maintain the image proportions.
Training a New Model: If your camera image size differs significantly from the standard YOLO input size, and the above methods are not applicable, you may need to consider training a new YOLO model to fit your camera image size. This ensures good model performance on images of different sizes.
Regardless of the method you choose, be aware that adjusting the input size can impact model performance, especially in object detection tasks. You may need to test and adjust in real-world scenarios to find the method best suited for your application.
Software Service
Industry information

- Views 27
- Author :Tony

- Views 37
- Author :Tony

- Views 9891
- Author :Tony
- Views 52
- Author :Tony

- Views 3172
- Author :Tony
- Views 1340
- Author :Tony
- Views 3258
- Author :Bruce Lee


Hardware & Software Support
We are deeply rooted in Hong Kong’s local services, specializing in hardware and software issues.
System Integration
Hardware and software system integration to enhance stability and reliability.
Technical Support
Professional technical team providing support.
Professional Technical Services
Focused on solving problems with cutting‑edge technologies.